Koi Fish Facts
Inspecting Koi Fish: To Have and to Hold
Nov
To inspect or not to inspect your Koi fish? That is the question. However, inspecting koi fish is not something many koi keepers do, much less ask about doing. After all, koi are to be seen, not held.
Sure, the occasional brush on the fingers as they swim past your hand in the pond or a kiss on the hand while you feed them is ok, but not picking them up out of the water.
In some instances, with illness or distress, a koi keeper will have to handle his or her koi, but not otherwise. But should you inspect your koi outside of extreme circumstances? Our reply: Sure, why not?
Inspecting Your Koi Fish? Why?
A lot of “experts” will tell you to avoid handling your koi as much as possible, and so many koi owners will avoid netting their fish unless there is a situation where it becomes unavoidable.
Attempting to net and/or bowl a koi that has zero interest in being singled out for attention can be a Herculean effort. The result is stress—for both the koi and its keeper
So, with all the potential stress floating around (quite literally!), is the juice worth the squeeze? (Editor’s note: DON’T SQUEEZE THE KOI!!)
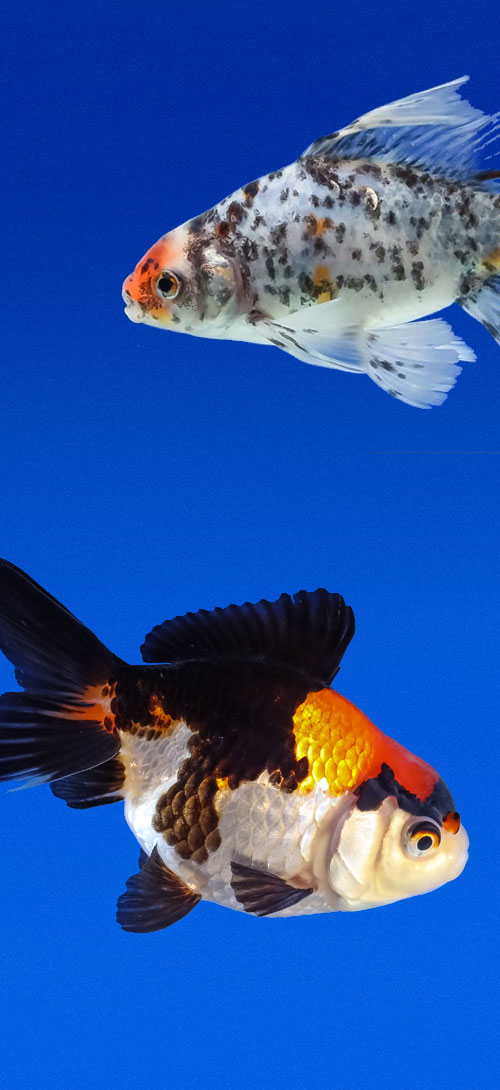
Most koi keepers will only be able to enjoy seeing their koi from above—which is the best way to see the gorgeous patterns and scalation on your koi! This means that a lot of potential issues that are on or below a koi’s lateral line, or lower fins will go unnoticed if not seen up close.
Getting your koi to the surface and in a viewing bowl will allow you to see firsthand if there is something that needs addressing or monitoring. It is something you cannot scan for when just watching them swim around your pristine pond. In other words, inspection your koi fish creates a baseline for any future issues.
All in all, it’s a great way to really get to know each of your fish on a more intimate level and will give you a completely new appreciation of your Living Jewels.
So What are You Looking For?
Parasites and Bacterial infection
There are some parasites that are visible to the naked eye. Fish lice and anchor worms can be identified just by looking at the koi.
Look for lesions, scrapes or other openings. These can be entry points for bacteria and other illness vectors to take advantage of.
Scales and skin
- Run your hands down the body. Both scales and skin should be smooth to the touch.
- Check for redness or swelling. This can be indicative of some bacterial infection.
- If you notice any missing scales, bumps or blemishes, take a photo and compare the next time you check your koi.
Body symmetry
- Looking from the nares (nostrils) to the caudal (tail) fin, you should be able to draw a straight line.
- There shouldn’t be any bulging or protrusions on either side of the koi.
- Check for any type of growth.
When Should You Do It?
It’s best to inspect your koi at seasonal “opening” and “closing” times.
Spring
This is when your koi are coming out of their colder water torpor and are not as fast moving as they are in the warmer months.
Other than being a great time to see if winter had any surprises for your koi’s overall health, it is also when any signs of Aeromonas infection will start to manifest.
Late Fall
Before winter hits and you shut down shop is another good time to see how your koi have fared over the summer. During the winter months, the koi slow down to a crawl as the water temperature (and their body temperature as a result) lowers.
Most bacteria and parasites are not a factor in colder waters, but it is still important to ensure that your koi head into winter in the best possible health so that they will get up to speed more quickly (and safely) in the spring and summer.
How to Catch a Koi
First, it is about catching your koi. No, it’s not as aggressive as it sounds.
Watching videos of highly experienced koi handlers at Japanese koi farms who make it look like a casual art form would seem to suggest this is a snap. But make no mistake, it takes patience and practice.
And it helps to have the right equipment.
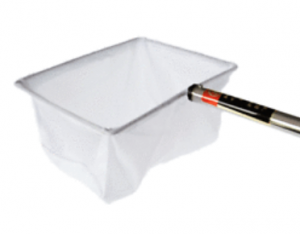
Pan Net
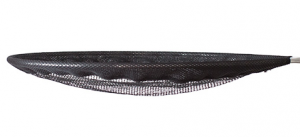 These are koi specific nets used by breeders around the world. As the name suggests, it resembles a pan, consisting of a wooden (or aluminum) pole and a round frame net head that supports a shallow net.
Both the pole and the net come in a variety of sizes to be able to accommodate the different sizes of the koi as well as the depth of the pond or tank.
If you have a large or deep pond, a wide-diameter net head (in excess of 42”) offers a bigger surface area and so less space for a fidgety koi to escape into.
The mesh should be a soft, woven nylon that isn’t knotted. One of the biggest mistakes made by koi keepers is to get a net with mesh that has large holes (similar to what is used to cover a pond).
The tighter the mesh (or the smaller the holes between strands) the less likely the koi is to injure a fin or lose a scale.
Dip Net
 The principle is the same as the pan net, however, a dip net is slightly deeper than the pan net. The dip net is useful in smaller spaces and with smaller fish when it the koi in question is confined to a relatively small space
Steps to Take:
- Quiet Entry—don’t just drop the head into the water, as splashing into the pond or tank won’t make the fish too excited about the project.
- Put Down the Cell Phone—it might seem silly, but talking loudly or making unnecessary noise can put the koi on edge. Plus you don’t want to drop it into the pond.
- Slow and Steady—don’t make any sudden or jerky movements as it will make the koi skittish.
- Left to Right—known as slicing, this is how the net is moved to be able to corral the koi you want without making it jumpy. It also helps with drag and makes it easier to get through the water.
- Up, Up and Away—once you have the koi in the net, slowly lift the net toward the surface. It will help to keep the koi calm.
- Into the Bucket—tilt the bucket down so that you can steer the koi toward the viewing bowl without having to pick it up out of the water with the net.
Sock Nets
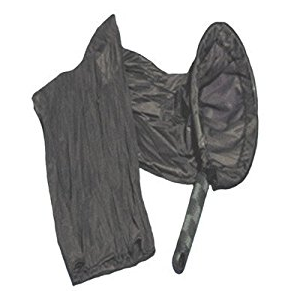 This is another method of transporting koi small distances. A sock net is helpful for moving fish, especially larger ones from one location to another with less chance of it jumping or accidentally being dropped. It is also a must-have for anyone that is bagging koi.
Unlike the pan net, this is a long, cylindrical mesh net that is open at both ends. Once the koi has been secured head first into the top of the net, the bottom is pinched closed on the other end by hand.
Once the koi is over its new home, or where it is to be located, the net is gently lowered into the pond and the koi can swim out the bottom end head first with no stress to the gills.
The nylon net itself comes in different weaves. The tighter the weave, the slower the water will seep out of it.
Some tips
- Wet the Sock First—nice to have a little moisture to make the water-based koi more comfortable, and also create less friction.
- Pinch the Bottom Closed—don’t laugh. People do forget.
- Isolate the Koi—getting the koi into the bowl or tub (or a pan or dip net if you can’t get a bowl into the tank or pond) creates less stress on the koi and you won’t have to chase it around.
- Slowly and Headfirst—same as the pan net, no quick or jerky movements, just slowly maneuver the net over the koi’s head.
- Lift and Go—once the whole koi is in the net, pick it up and move it.
- Let ‘er Rip—once the net is submerged, release the bottom and slowly pull the net out top first and the koi will slip/swim into the water.
Viewing Bowl
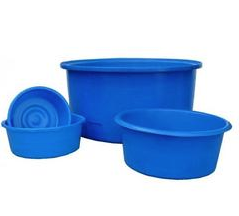 Fill the bowl about halfway up with water. This way the bowl will float, but the edge will be high enough that koi can’t easily escape. It may jump, but it can’t just swim away. And—as an added bonus—your bowl won’t sink!
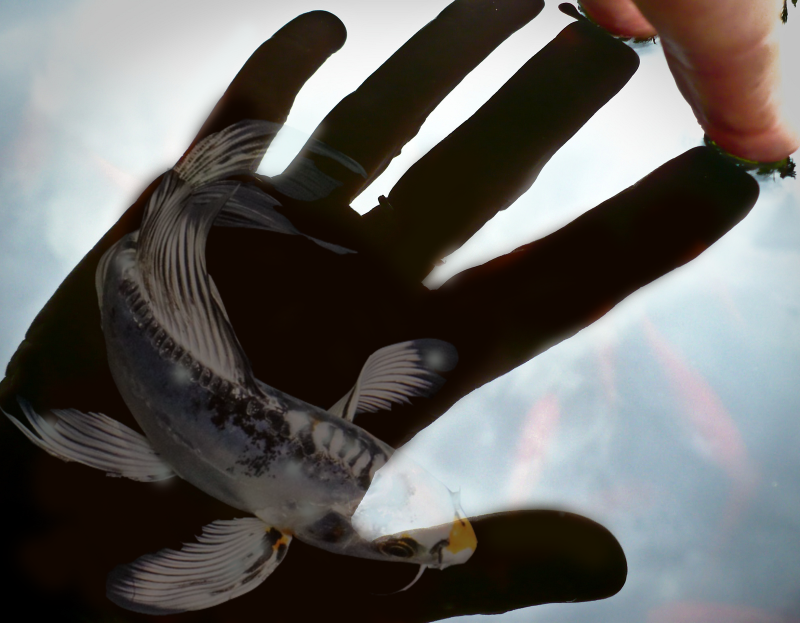
Once you have gotten the koi into the bowl, now the fun part really begins. Handling an uncooperative koi takes some patience and practice, but here are a few tips that might help.
- Be Confident—confidence breeds calm. If you believe you will be able to hold your koi, they will too.
- Proper Positioning—pull to the side of the bowl.
- Spin to Subdue/Calm—if you do have a jumpy koi, turning it around slowly in the bowl can subdue it long enough to get a hold of it.
- Headfirst—when you have hold of the koi, the head should point toward you.
- Nose to Palm—nestle the nose into the palm of your hand.
- Fins between Fingers—if possible, get the pectoral fins supported between your pinky and ring finger and the thumb and forefinger.
- Base Support—get the other hand under the belly to support the weight.
- Cradling—mimic the koi’s movements as it moves back and forth.
- Soft Hands—your koi will squirm, but resist the urge to squeeze too hard.
- Flip and Focus—turn the koi over to check for any lesions, scrapes or deformities on the underside of the koi. You can check the mouth too, to ensure it is functioning properly (ie the lips are opening downward).
All of this should take less than 30 seconds before putting the koi back into the pond (or bowl if you need to investigate further).
Photographing Your Koi
Now that you have your koi in a bowl, you might as well snap some pics—for your own records as well as to “wow” other koi keepers. You know, to brag. Photographing your koi once a year is also a great way of recording your Living Jewels’ progression. You can see growth as well as how the color changes over time.
It takes a little practice, and a steady hand (a decent camera doesn’t hurt!), but you can give your koi a little “show” treatment.
For more tips on how to get photograph your koi, check out our article How to Photograph your Koi: 5 Tips.
Scraping and scoping
If you have the tools and implements ready to perform scoping and scraping, now is a good time to get them out and have them ready. Because if you do notice something that you might need to investigate, you won’t need to put the koi in question back into the pond. Here is a little more reading on how to scrape and scope.
TIP
Although not required, an extra set of hands can be, well, handy. The helper can snap any photos as well as lend a hand if more research or investigation is necessary.
Don’t be shy to get to know your koi. Caring for them involves knowing everything about them. The more you know about them, the more aware you will be if something isn’t quite right.