Koi Fish Facts, Koi How To's
How To Perform A Skin Scrape On Your Koi
As a Koi owner, it’s possible you may have to deal with a parasitic infestation at some point. The tricky thing about parasites is that most are invisible to the naked eye. To properly diagnose and treat a parasitic issue in your pond, you’ll need to perform a skin scrape on your Koi. This process can look intimidating initially, but with the proper preparation and method, you’ll see that it’s a relatively simple, easy, and safe task.
What is a skin scrape?
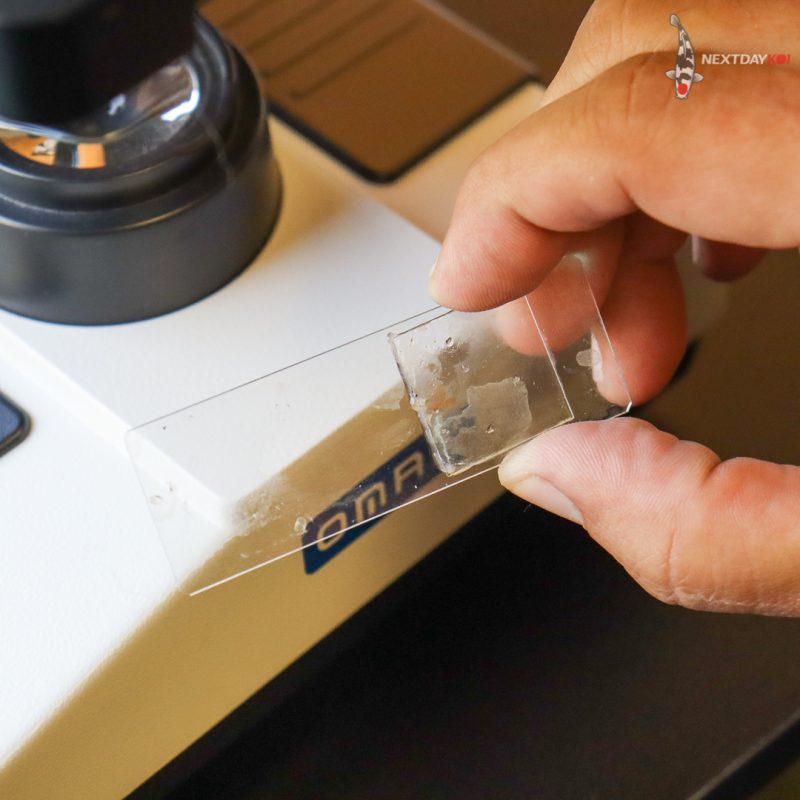
A skin scrape is a diagnostic method used to identify the presence of parasites. It involves removing a small amount of mucus from the slime coat of your Koi and then viewing the sample under a microscope. This will allow you to determine if there is a parasitic infestation in your pond and, if so, the type of parasite so that you can administer the best treatment as soon as possible.
How do I know if my pond has a parasite issue?
It’s important to note that parasites are almost always brought into a pond by a new fish or plant. The best way to prevent a parasitic infestation is to follow proper quarantine procedures before introducing new additions to your pond. Once parasites have entered a pond, they can multiply extremely quickly and become a threat to the entire pond population–which is why quick identification and treatment are crucial.
The most significant indication that your Koi has a parasite is if it’s behaving unusually. This can include flashing, scratching, twitching, rapid or labored breathing, gasping for air, loss of appetite, and lethargy. Depending on the type of parasite, there may be physical and behavioral signs. These might include color loss, redness, inflammation, ulcers, sores, and clamped or frayed fins.
However, before jumping to conclusions, rule out any other environmental triggers that could be responsible for unusual behavior in your Koi. Test water quality to ensure water parameters are at acceptable levels, check for evidence of potential pond predators and double-check that all your pond equipment is functioning correctly. If everything else looks in good shape, it’s time to check for a parasitic infestation.
Equipment To Perform Successful Skin Scrape
Before performing a skin scrape, make sure you have all the necessary equipment gathered.
Things you’ll need:
- A microscope: You don’t need to shell out hundreds or thousands of dollars for a top-of-line microscope. All you need is a simple compound microscope. An optical magnification of 10x and an objective lens of 40x will get the job done. A built-in light is also helpful. These are available at several online retailers, science stores, and some fish and Koi supply stores.
- Sterile glass microscope slides
- Sterile slide cover slips
- Pen and paper
- Sock net
- Koi viewing bowl
- One cup of pond water
- Tweezers
- A hand towel
- Preferably, a helper
How to Perform a Skin Scrape
Pre-Scrape Prep
Start by choosing the areas of the Koi you will scrape. It’s best to scrape more than one area and more than one fish. A few good options are at the base of the dorsal fin along the back, behind the pectoral fin, and the gill. If there are any open wounds or lesions, sampling around those areas is also a good idea. Set out a clean piece of paper for every scrape, noting the fish and location of the sample. This will help keep your slides organized after you scrape.
Before catching your Koi for a sample, assemble all your equipment on a clean, dry surface. Next, fill your viewing bowl with enough pond water to cover the fish fully.
Selecting and Netting Your Koi
It’s recommended to perform a scrape on 3-6 different Koi. When choosing which Koi to obtain samples from, start with any Koi that have been behaving oddly, appear to have excess mucus, or are showing visible signs of illness. It’s also suggested that you scrape at least one Koi that seems in relatively good health to get a better idea of the condition of the entire pond population.
Once you have chosen which Koi to scrape, it’s time to catch your first Koi. Netting Koi can be difficult and time-consuming, so try to exercise patience and don’t expect success on the first try. To do this, gently and slowly submerge your net into the pond. Avoid chasing the fish, as this can cause unnecessary stress and make it more challenging to catch. Try to approach the fish from the front and coax it into the net. Once your Koi is securely in the net, place the net into the viewing bowl and carefully transfer it into the bowl. The water level should be low while still covering the gills.
Collecting the Sample
To obtain the sample, you’ll need a scraping instrument. This could be a small spatula or the corresponding microscope slide for the sample. With damp hands, hold your fish against the side of the viewing bowl with the area you intend to scrape first out of the water. Holding your scraping instrument at a 45-degree angle, apply light pressure and glide the edge of the instrument along the sample area. To avoid damaging your Koi, never scrape against the scales. The mucus will look clear or slightly opaque. You only need a small sample, about the size of a pencil eraser, so don’t over-scrape.
While having a helper isn’t essential, it makes the job much easier. One person can hold the Koi while the other performs the scrape. If you used an instrument other than a microscope slide to obtain your sample, carefully transfer the sample onto the slide without touching the mucus with your hands. When the sample is on the slide, cover the slide with a slide cover slip. Then, place the slide on its corresponding labeled paper and keep it out of direct sunlight.
Repeat this process for each sample area. Be sure to give your Koi a break between sample collections by releasing it back into the viewing bowl. Once you’ve finished obtaining samples from one fish, release it back into the pond and repeat the process with the next fish until all scrapes are completed.
It’s important to note that performing a skin scrape is just one aspect of parasite detection. Obtaining a sample of gill tissue is essential for diagnosing parasites impacting the gills.
Each parasite will have a different appearance when viewed under the microscope. Once you’ve collected your skin scrapes, our Comprehensive Guide to Koi Diseases can help you correctly identify and learn how to treat parasitic infestations in your pond best. Swift and proper treatment will help give your entire pond population the best chance of recovery.
Looking for a few new additions to your pond? Shop our full selection of Koi and Goldfish today.


